16 Expert iPhone Photography Tips to Capture Beautiful Photos
Tired of taking iPhone photos that look flat, dull, or just…ugly? The cause is not from your iPhone. As a matter of fact, its camera is an incredible tool. You should be aware of a few simple techniques that can significantly upgrade the appearance and feel of your photos. iPhone photography is simpler than you think. It’s easy, fast, intuitive, and always within reach.
This blog shares 16 expert iPhone photography tips to help you shoot with more confidence and creativity. These tips will help you see what’s possible when you give the iPhone camera a little more attention.
Lock Focus on Subjects
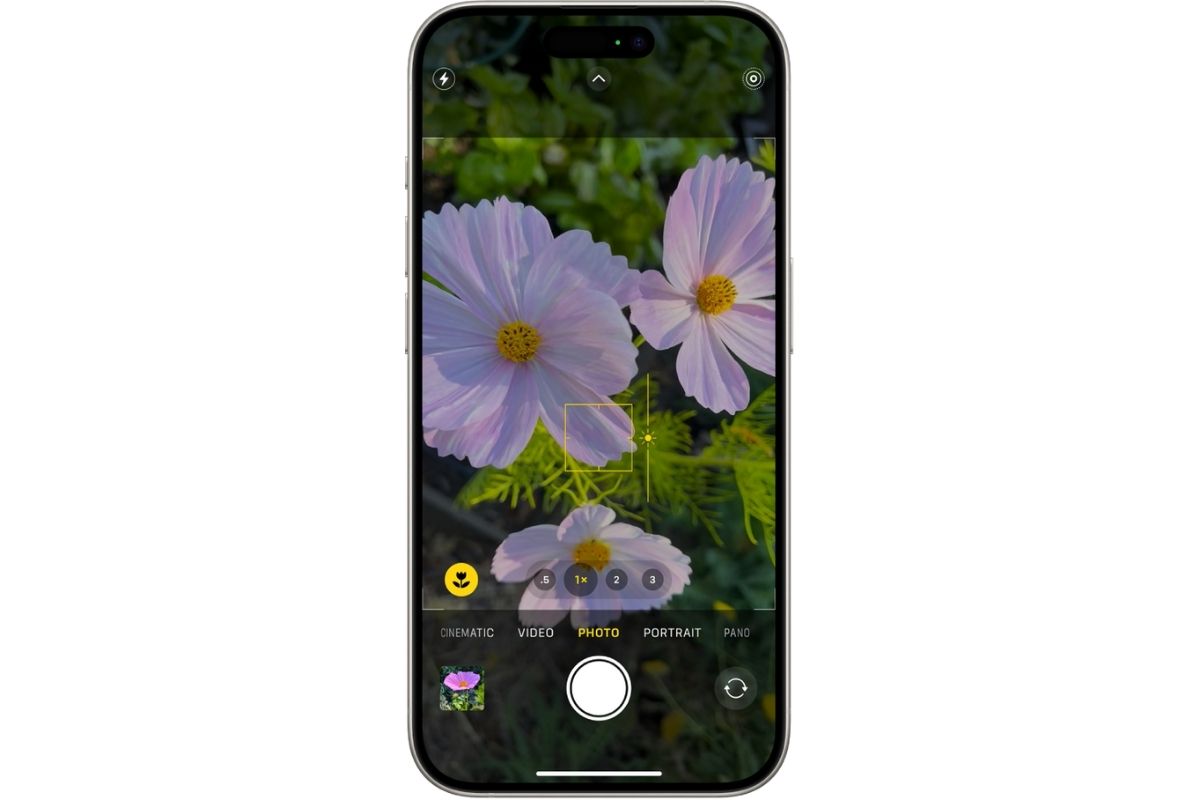
If you’ve ever tapped to focus and dialed in the perfect exposure, only to have everything shift the second you reframe or move slightly, you’re not alone. You lost a great shot to an automatic adjustment you didn’t ask for. The iPhone’s automatic adjustments are helpful most of the time, but they can get in the way when you’re going for a consistent, well-lit shot. That’s exactly where AE/AF Lock comes in handy.
To use it, simply press and hold your finger on the part of the screen where you want the camera to focus. After a second, a yellow box will appear with the words “AE/AF Lock” at the top of the screen. Your focus and exposure are now locked. No more jumping focus or shifting brightness while you shoot.
You can still tweak the lighting by dragging the sun icon up or down. When you’re ready to unlock, just tap anywhere else on the screen. It resets instantly.
Use the Compositional Grid
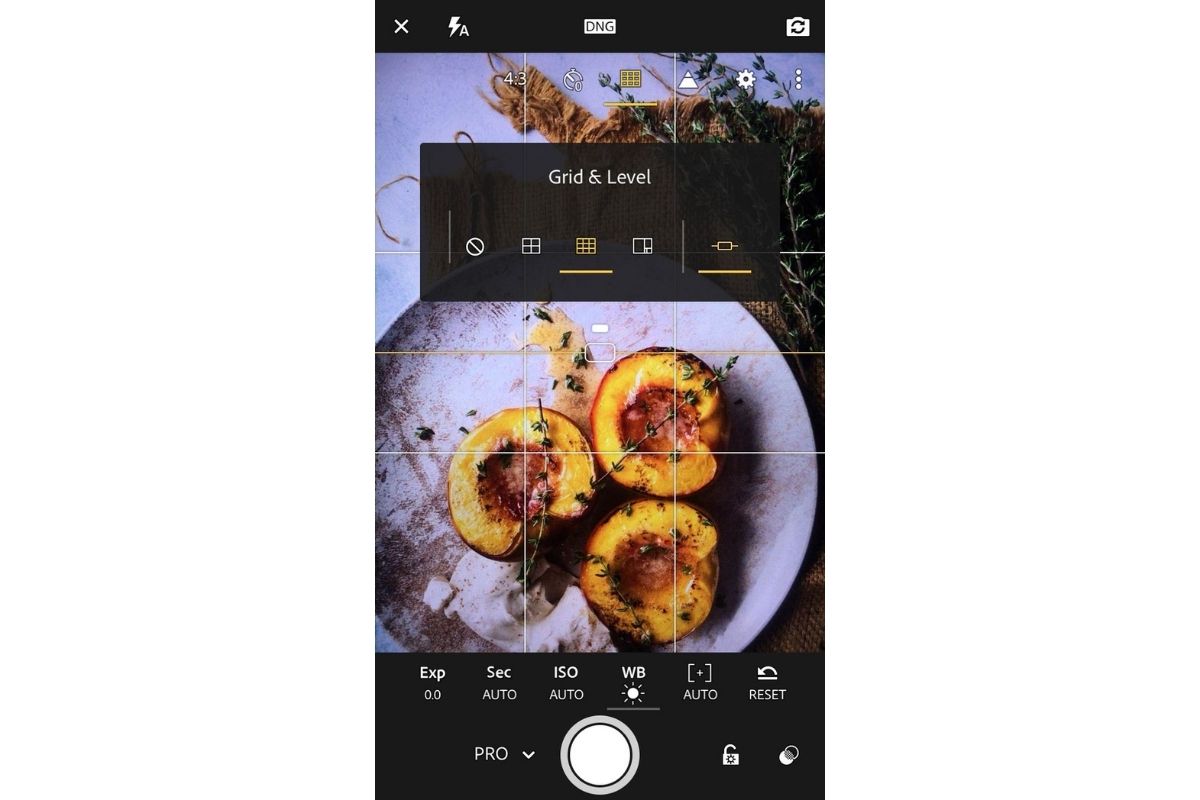
Turning on the grid in your iPhone’s camera settings does you a good turn by applying one of the most classic photography techniques — the Rule of Thirds.
It's easy to activate the grid; simply head to Settings > Camera > Grid and make sure the toggle is turned on. Once enabled, you’ll see two horizontal and two vertical lines dividing your screen into nine equal rectangles. Feel assured, these lines won’t show up in your photos; they’re just there to guide your framing.
How do you use the grid? Place your subject at one of the four points where the lines intersect. These spots naturally draw the viewer’s eye and create balance in your shot.
Grid also works for alignment. Use the horizontal lines to keep your horizon level in landscapes or to align your plate to be centered in a flat lay.
Portrait Mode for Depth
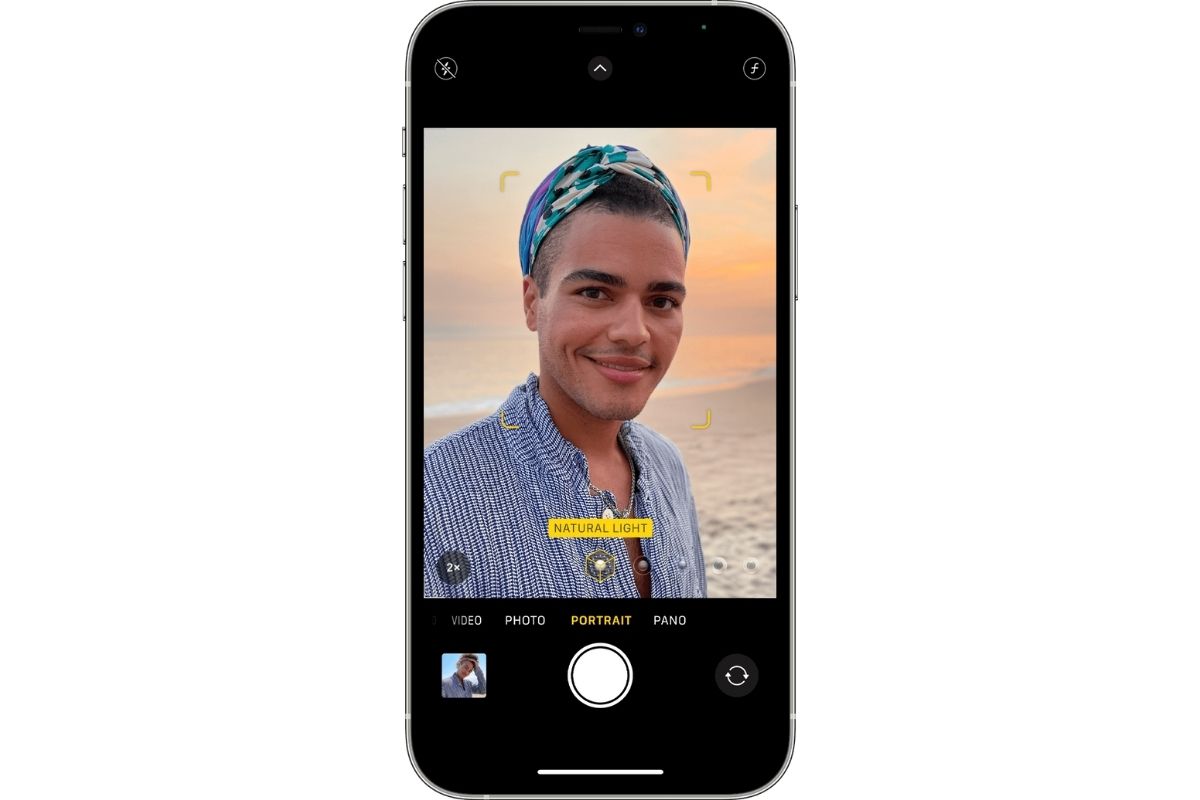
To make your subject pop and the background blur softly behind them, you should use Portrait mode. This mode mimics the shallow depth of field you'd normally get with a DSLR lens. Even though Portrait Mode is a feature of the iPhone, it does a surprisingly good job.
You can find Portrait mode by swiping through the shooting options in the iPhone Camera app. Once you’re there, frame your subject and wait for the depth effect to kick in. You’ll usually see a message that says “Natural Light” or another lighting option when it’s ready to shoot.
Portrait mode works best when the subject is a few feet away and clearly separated from the background. You should use it for photographing people, pets, food, or even products, anything you want to emphasize.
You can also adjust the level of background blur after you take the photo. Just tap “Edit” on the image and slide the depth control (f-stop) to make the background more or less blurry.
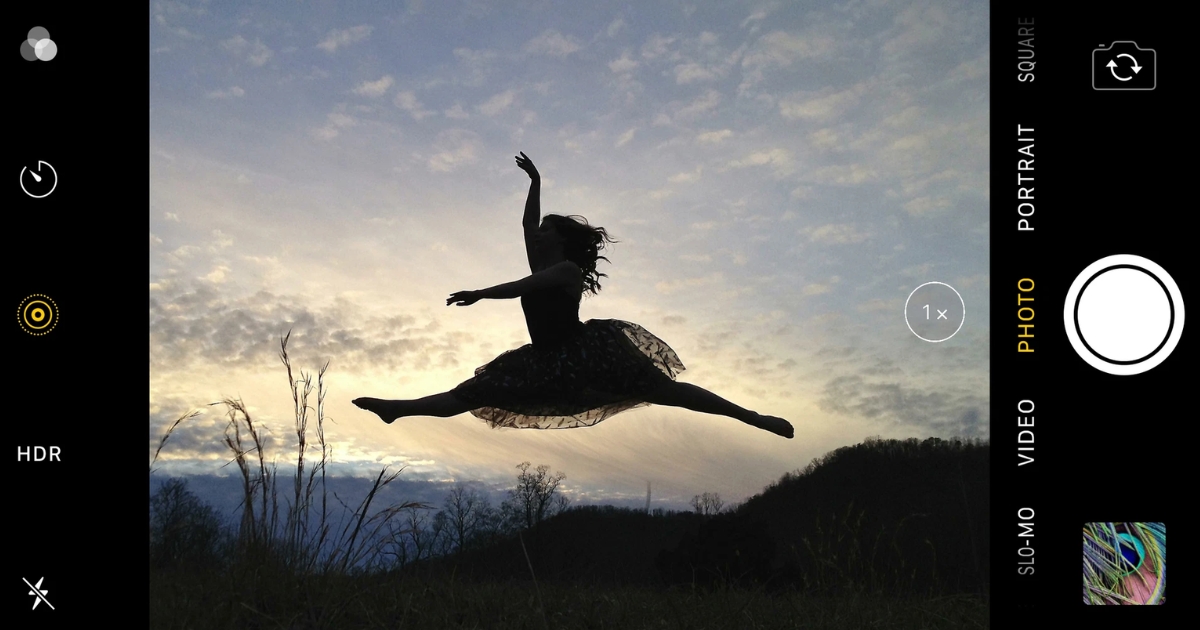
Use Live Photos for Motion
When you turn on Live Photos, your iPhone records 1.5 seconds before and after you press the shutter. You will have a short, silent video clip that feels more alive than a single frame.
To turn it on, open the Camera app and tap the circular icon at the top (it looks like a target). If it’s yellow, Live Photos is active. The next step is to shoot like normal. You can view the motion by pressing and holding the photo in your gallery.
Live Photos are great for dynamic scenes: waves crashing, city lights blinking, or kids running around. It can completely shift how you tell a story with your images.
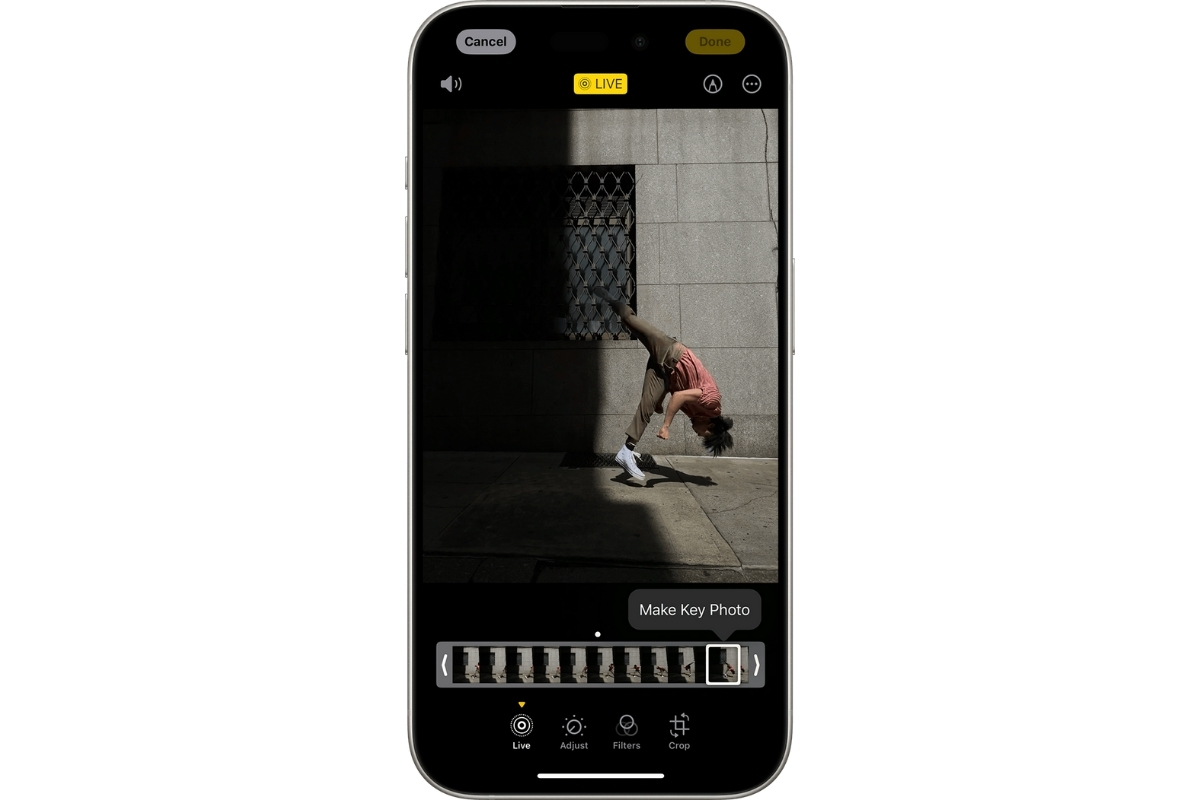
Take Long Exposure from Live Photo
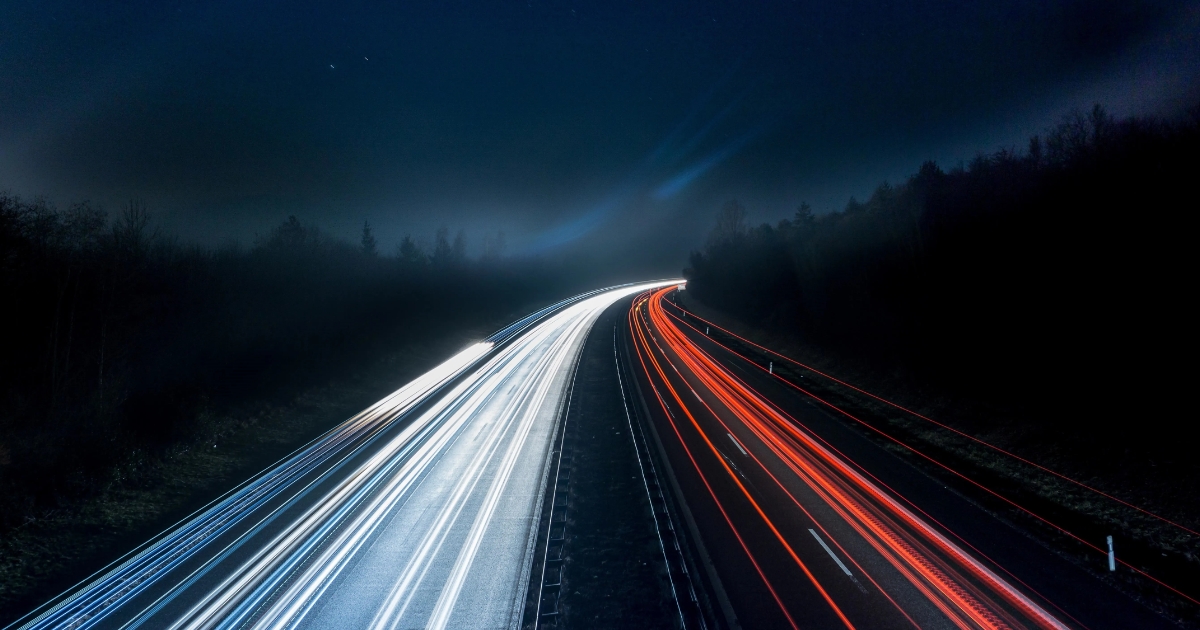
Do you want to create that dreamy, motion-blur look like waterfalls, trailing car lights, or soft-moving crowds without a tripod or fancy settings? The iPhone’s Live Photo → Long Exposure trick makes it surprisingly easy.
Here’s how to do it: first, make sure Live Photos is turned on in the Camera app (look for the yellow circle icon). Then, take your shot of something in motion, like water, traffic, or someone walking through a scene.
Once the photo is captured, go to your Photos app and open the Live Photo. Swipe up on the image (or tap the “Live” dropdown in the top-left corner, depending on your iOS version). You’ll see a few effect options: Loop, Bounce, and Long Exposure. Tap Long Exposure, and just like that, your photo is transformed into a smooth, blurred image that mimics what a DSLR would do with a slow shutter speed.
This effect works best when your phone is as still as possible. You should lean it on a railing, set it on a flat surface, or use a tripod for even better results. The more consistent the background, the cleaner the motion blur.
Shoot in Burst Mode for Action
Burst mode captures a rapid series of photos in a row, giving you the power to choose the exact moment that nailed it.
To use Burst mode on newer iPhones (with Face ID), press and drag the shutter button to the left. On older models with a Home button, just hold the Home button down. Your phone will fire off up to 10 photos per second until you release it.
Once you're done, head to your Photos app, open the burst, and tap “Select…” at the bottom. Scroll through the shots and choose the ones that capture the action perfectly. Then tap “Done” and keep only the ones you love.
Use Night Mode in Low Light

Shooting in low light can generate grainy photos or blown-out highlights. iPhone Night Mode activates automatically when your camera senses a dark scene. You will capture more light, better color, and crisp detail, even without a flash.
When Night mode is on, you’ll see a small yellow moon icon appear at the top or near the shutter. A number next to it shows how many seconds the exposure will take (1 to 3 seconds if handheld and longer if your iPhone is steady). You can tap the icon to manually extend or shorten the exposure based on the scene.
For the best results, try to hold your phone as still as possible. If you're shooting handheld, brace your elbows or lean against a support for stability. Better yet, use a tripod. On newer iPhones (like iPhone 13 Pro and up), Night mode can be exposed for up to 30 seconds when stabilized, which opens the door to astrophotography. Yes, you can photograph stars with your phone.
QuickTake Video in Photo Mode
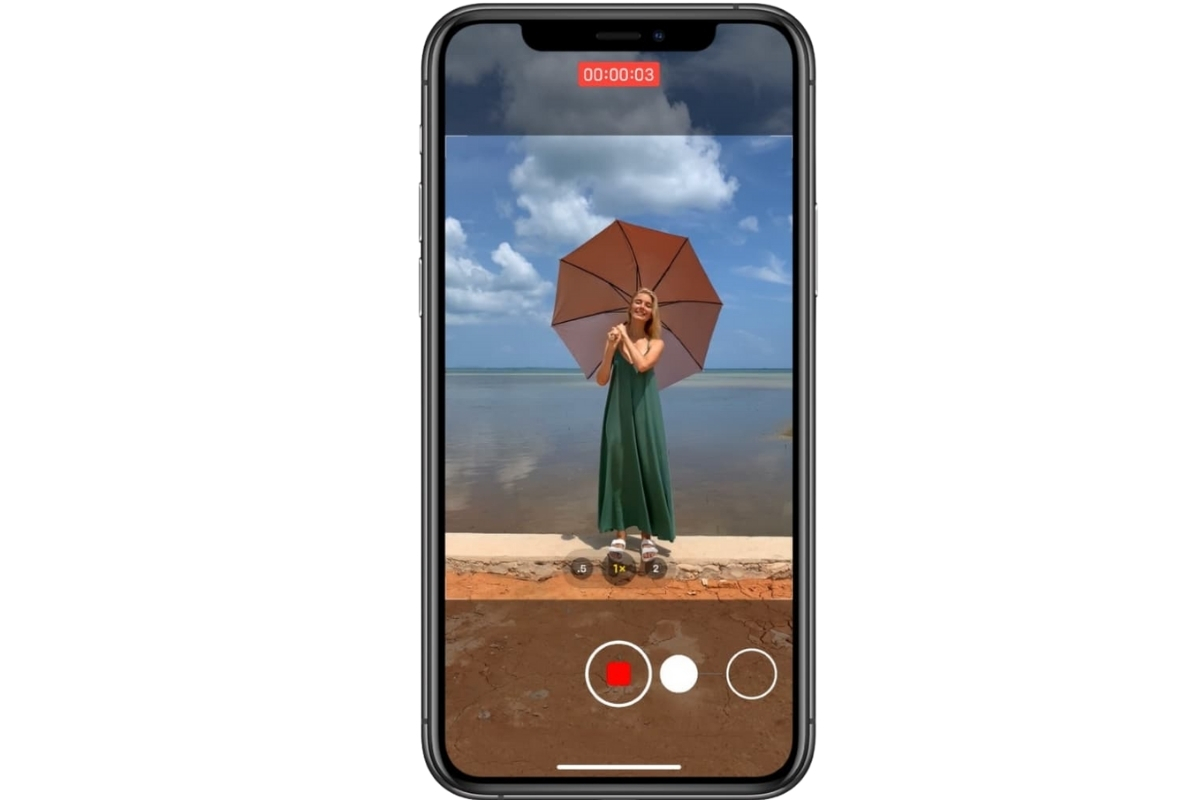
Sometimes a moment moves faster than you can switch modes. By the time you swipe over to “Video,” it’s gone. At times like these, you should use QuickTake. It lets you start recording a video instantly.
Here’s how it works: just press and hold the shutter button while in Photo mode. Your iPhone will immediately start recording video. You don't need to fumble through modes or miss the moment. Let go to stop recording, or swipe right while holding to lock the video and keep recording hands-free. On iPhones with a volume-up shortcut, you can also hold the volume-up button to activate QuickTake.
QuickTake is available on iPhone XS, XR, and newer models. This mode is not a full-featured video mode, but it’s fast, responsive, and exact.
Use Apple ProRAW (on supported models)
.jpg)
If you want to have maximum editing power with your iPhone camera, Apple ProRAW is the tool you need. Available on iPhone 12 Pro and newer Pro models, ProRAW combines the flexibility of RAW files with the smart processing of Apple’s image pipeline.
When ProRAW is enabled, your iPhone captures photos with more image data, such as dynamic range, detail in shadows, and less compression. Now, you can fine-tune exposure, adjust white balance, pull back blown-out skies, or recover detail in dark areas without the image falling apart.
To turn it on, go to Settings → Camera → Formats, then toggle on Apple ProRAW. You’ll see a “RAW” button in the Camera app, just tap it on or off before you shoot, depending on whether you want that extra data for editing.
Keep in mind that ProRAW files are large (often 25 MB+), so it’s best to use them when you plan to edit later in Lightroom, Snapseed, or the iPhone’s built-in editor.
Adjust Exposure Manually
The iPhone camera does a decent job balancing exposure automatically, but sometimes it gets it wrong: skies too bright, faces too dark, or details lost in shadow. To handle them, you should use manual exposure adjustment.
Here’s how to do it: tap anywhere on your screen to set focus. When the yellow focus box appears, look for the sun icon next to it. Slide your finger up to brighten the scene or down to darken it. This tip is easy, fast, intuitive, and incredibly effective.
Use Timer Mode
Timer mode gives you a few seconds of delay between pressing the shutter and taking the photo. A few seconds to set your pose, steady your hand, or step into the frame.
Open the Camera app and tap the small arrow at the top of the screen. This reveals additional settings along the bottom. Tap the clock icon, then choose either a 3-second or 10-second timer. Once you press the shutter, a countdown will begin. You have time to adjust your expression or get your hand out of the shot.
Try Photographic Styles (on iPhone 13 and later)
.jpg)
Introduced with the iPhone 13 lineup, Photographic Styles is the way to choose a look for your photos right from the moment you shoot them.
Filters are applied after taking a photo. On the contrary, Photographic Styles are baked into the image as it’s captured. You can pick from options like Rich Contrast, Vibrant, Warm, or Cool, adjust the tone and warmth sliders.
To set it up, go to Settings → Camera → Photographic Styles, or choose it directly in the Camera app (tap the arrow at the top, then tap the multi-square icon). Once you select a style, it stays active until you change it again.
Understand Wide-Angle vs. Standard Lens
Knowing when to use the wide-angle versus the standard (main) lens can completely change how your photo feels.
Just tap the “0.5x,” “1x,” or “2x/3x” options directly on your camera screen to switch between lenses. The standard lens (usually labeled “1x”) is the default. It captures balanced, natural-looking shots with minimal distortion. It’s great for portraits, close-ups, and food.
The wide-angle lens (usually “0.5x”) pulls back and shows more of the scene. It exaggerates perspective a bit, making foreground subjects look bigger and the background feel deeper. It’s perfect for landscapes, architecture, group shots, or when you’re in tight spaces and can’t physically step back. Just be mindful that edges can sometimes appear warped or stretched if you're too close to your subject.
Macro Photography via Ultra‑Wide Lens

The Ultra‑Wide lens in iPhone 13 Pro or later can capture tiny details like dewdrops on leaves, the texture of the fabric, and the pattern in a butterfly’s wing.
Here’s how it works: as you move your iPhone close (within about 2 cm) to a subject, the camera automatically switches to the Ultra-Wide lens and engages Macro Mode. You’ll notice the focus snap into those up-close details. There's no toggle required; it just kicks in when you get close enough.
Remember to move slowly and pay attention to focus. Tap to lock it if needed, and try adjusting your exposure slightly using the sun icon. A steady hand (or tripod) keeps those extreme close-ups sharp.
Camera Control Button (iPhone 16+)
.jpg)
With the iPhone 16 lineup, Apple introduced something photographers have been craving for years: a dedicated Camera Control button.
Located on the lower edge of the phone, this button is pressure-sensitive and multi-functional. A light press locks focus and exposure, a firm press takes the shot. Press and hold to record video with physical feedback that feels more like using a traditional camera.
Smart HDR with Multi‑Person Scene Optimization

Smart HDR is built into the iPhone’s image processing and kicks in automatically in challenging lighting. Smart HDR works behind the scenes, analyzing different faces in the frame and adjusting for things like skin tones, contrast, highlights, and shadows simultaneously. Whether everyone's standing in bright sunlight or shade, all of them in the shot will get the right treatment. Smart HDR balances tricky backgrounds, like sky and foliage, so you don’t end up with blown-out highlights or dark shadows.
Conclusion
These 16 expert iPhone photography tips will help you capture the kind of photos you’ll be proud to share. You don’t need fancy gear or hours of editing. iPhone camera will surprise you. Beautiful photos are closer than you think.